I posted about putting the racks up here.
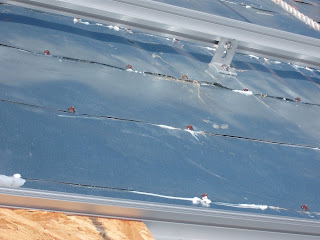
Once a good weather day came to install the panels, we prepped by caulking and reinforcing the screw schedule for the roof shingles. The galvanized steel we used was not ideal and needed a little extra help to keep it water tight.
Next, we prepped all the penetrations in the roof. In our case, we are planning to add solar thermal panels that will use the waste heat behind our PV panels to heat water, so we needed to add plumbing and electrical penetrations.
We started with these rubber boots that are made of a material that can withstand high temperatures and are also watertight.
Next, the copper plumbing and electrical went through the boots and into the inside.
This involved some awkward positions.
And a supervisor enjoying the view of the aspen grove from the 4th level scaffolding (note the harness and rope to still this Mama Builder's beating heart).
Next solar wires were pulled through the electrical penetrations.
A grounding wire was secured.
And then we got to these.
(As with so much of this project, the solar thermal panels that will be installed behind the PV panels are going to be highly engineered, custom fabrications for which we had to purchase innumerable custom materials. It was looking like I was going to be hosting a testosterone-rich aluminum welding party complete with buffalo wings and beer for the several males who were vying to do the job. I'll certainly keep you posted if that happens. The solar thermal panels will be completed and installed within the next month or so.)
The panels were lifted through the windows and passed up the scaffolding.
Then they were carefully moved into place.
Wired together.
And secured in place.
The weather at the end of this day changed from blue to very cold and foreboding so we called it a day and covered the 3 panels we got into place before the weather chased us off.
We came back later and installed the rest of the panels. Here they are with a lovely ice sculpture hanging from them.
Then we connected everything up to the inverter in our basement, which efficiently converts the DC electricity coming from our panels to AC electricity that can be used by our appliances.
(does this look familiar, K&E?)
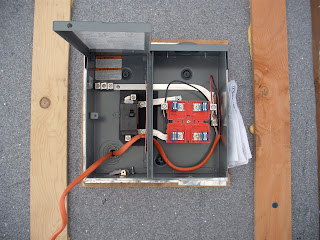
We then connected our system to a special meter provided by the power company which helps them determine how much total electricity we make. Our regular meter is a "Net Meter", meaning that it keeps track of the amount of power we produce MINUS the amount of power we buy from the power company. We're hoping that the power company will be sending us checks more often than we're sending them checks!
Here's the box we installed for the production meter.
Now we just admire our pretty panels and the read-out on the inverter showing the amount of power they produce!
P.S. You are all invited to our Megawatt party to celebrate our system producing a Megawatt-hour of electricity. Based on our anticipated production rates, it will probably be sometime in the latter part of June!


Yes it does look familiar!! :) Congratulations!
ReplyDeleteParty Party - Hope we can come to your party and glow like megawatts! - Your monster I mean mother
ReplyDelete