Saturday, May 29, 2010

snow-mo-cart

It's not hard to get the feeling of being a sled dog at our building site. We brought in as many of our building supplies as possible before the snow fell last autumn, but it's inevitable that tools and materials had to be hauled in through the winter. You can get some sense of what that process was like in this post from January.

While the winter proved challenging for hauling, it's got nothing on the spring. We still can't drive right to our site, but now part of the road is plowed and melted, and the other part is still buried in 2 feet of snow. Our windows finally came in and needed to get to the site to be installed, but transferring heavy and fragile windows from vehicle to vehicle to get them to our site seemed imprudent. So, how to make the least number of transitions while traveling over varied terrain? James to the rescue!

Back in January, Ray constructed this sled from scrap 2x4s and an old pair of skis:
A few weeks ago when the windows first started arriving, we beefed up his original sled with extra bracing and a better pull-bar to haul in the heavy windows safely over the diminishing snow.
{picture taken May 7}

James devised a new improvement to the sled for all-terrain use: wheels and skis!
Yesterday we brought in the rest of our windows on this vehicle. As one of our laborer's noted: this is a high calorie way to get windows to a building site. I countered pointing out that human power is a lot more efficient than gas or diesel engines, so it actually uses fewer calories overall that hauling by truck, most likely. But, I will concede that this method, while perhaps more calorie efficient, makes for very sore and tired bodies.

James has plans to add pontoons next. And feels sure he can make the cart fly. Then what shall we call this go-anywhere vehicle? Suggestions welcome...

13

Thirteen is the number of years (as of today) that Papa Builder and I have been married. So much has happened in those intervening years. Joy and loss, vitality and illness, huge projects, every day monotony, disappointment and stunning accomplishment.

I feel so privileged and honored to have such a dear partner in life. He's smart, funny, handsome, talented, confident, ambitious, a loving and generous father, a committed and sincere husband.

This homebuilding project has tested us in ways that no other project we've taken on has before. And we're coming through still liking each other. I think there's a lot to be celebrated in that accomplishment!

Please, give your honey an extra squeeze to celebrate our anniversary.

xxoo

Tuesday, May 18, 2010

room with a view

My 36th birthday present was a concrete floor.

My Mother's Day present was a greenhouse wall. And like my fancy-pants highly engineered super design-y concrete floor on my birthday, this greenhouse wall was a rare and special gift with hours and hours of work preceding it.

Do you remember that post a while back about the glu-lams? That was one of the first steps of this gift. Unfortunately, they first set of glu-lams has a bowing problem, so another set were made and the first set were used for shorter pieces we needed and hopefully will be turned into some lovely furniture or something because I was really disappointed to learn about the bowing problem.

Anyway, here's the gluing of the new glu-lams on the brilliant lay-up frame James made.
And next was clamping and waiting for the glue to cure.
Once we had a bunch of straight glu-lams finally made, ...
... we sent them through the jointer to make sure the sides are at a 90° angle from each other.
Then all those glu-lams were sent through the planer a gazillion times until they were all the right thickness and width and the sides were parallel to each other.
Once we had all that lumber made, there was a lot of measuring.
Next, very precise rabbets and cross-halving joints were measured, cut, ...
... and routered.
Once all the pieces were cut, they assembled kind of like this.
The top beam of the wall was cut and milled from a store-bought glu-lam and rabbet joints were cut into it, at times well into the night.
Then there was the whole matter of the bottom beam that this wall sits on. It required a lot of planning and thinking and discussing, some of which happened in the very spot where this wall would be built.
Next there was sawing and milling to cut the floor beam to size...
And more sawing and milling to cut the back off the floor beam make these fancy cut-outs in the beam to house electrical outlets and insulation...
Then there was also some drilling to make even more room for insulation.
Then we installed the electrical boxes to house the outlets.
Then the whole thing was glued together, ...
... and a piece of pressure-treated lumber was attached to the bottom of the beam. Also, pressure treated plywood was added to the front of the beam to go over the edge of the concrete floor it will sit on and holes were drilled for the steel hold-downs that will connect the wall to the floor.
Then there was a bunch more sawing and milling and routering to finish this all up and then it was time to put it all together!!!

First, we put down EPDM sill seal and caulk to seal the joint between the floor beam and the concrete floor and prevent air infiltration.
The we put up the beam and there was some drama where we decided how to get the beam to be level and plumb.

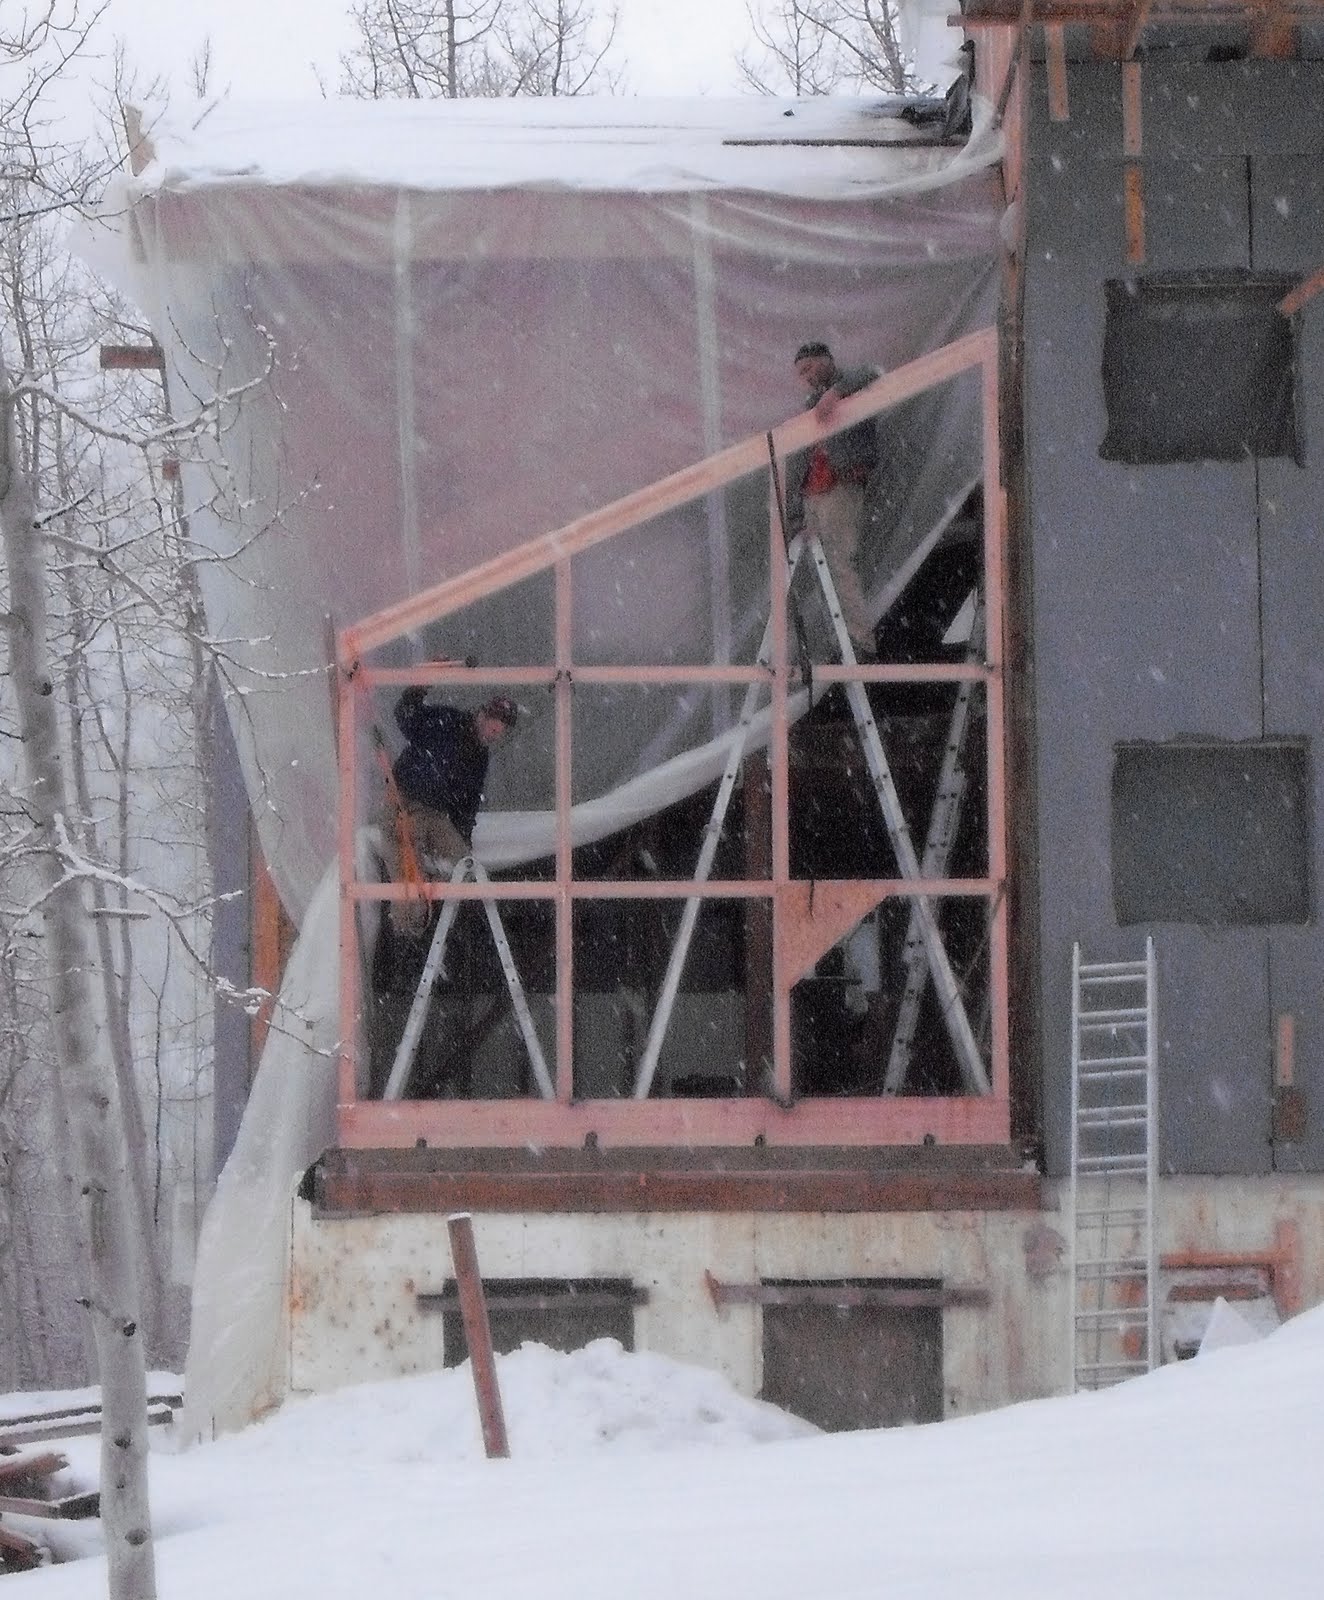
Next we started fitting together the wall, piece by piece.
Note the snow falling on this operation. Spring involves a lot of snow around these parts. Those of you from milder climes keep in mind these last pictures are happening on Mother's Day weekend!

I hope you all made lovely merriment with the Mothers in your lives. How did you celebrate?

Monday, May 10, 2010

sun dog

Friday we hauled in hundreds of pounds of material to the site by sled. It was hard work and my body is still feeling it. Here's what was overhead:
The sky was just gorgeous and surreal like that all day. I'm very sunburned from looking at it all day. There was a sinister side, though. Apparently that sun dog portended the snow that was falling this morning when I woke up. It's clear again for now and not too cold. Hopefully the predictions of 10 inches tomorrow are hogwash.

Signed,
So very ready for summer

Sunday, May 9, 2010

homage to my foremothers

On this lovely (dare I say spring-like, despite the forecast of snow for later in the week) Mother's Day morning, I'm thinking of my maternal and paternal grandmothers who both were significant influences on my life and both passed away within the last 2 years. 

Madge Gilbert Hallstrom (b. January 15, 1912, d. January 8, 2008) was my father's mother. For most of my lifetime she lived in Mobile, Alabama where my grandfather last worked as a chemical engineer and later retired. She was born and raised in middle Tennessee and had the lucky fortune to go to college for 2 years after high school before her family couldn't afford to send her anymore. She was very proud of this accomplishment – although perhaps disappointed not a finish – and talked about it as a significant and shaping part of her life well into her mid-nineties.

Nanny, as I called her, loved nature and was a skilled gardener and knowledgeable bird watcher. She was a woman who honored convention and liked to know that things were done the right way. She had a lovely, traditional style and always looked her best. She was thrifty, but appreciated quality, and expected things to last. The inheritance I have of hers that I use every day and cherish fondly is a toaster given to her as a wedding gift in 1939. When she was in her late 80's, the toaster broke and she took it to be repaired. The repair guy told her that it would cost too much to repair and she ought to go buy a new one for $30. She scoffed at his insouciance and spendthrift attitude, bought the parts, and fixed it herself. It still works beautifully for my family every day.

Martha Elizabeth "Tommy" Miller (b. February 1, 1916, d. September 5, 2009) was my mother's mother. For my whole lifetime she lived in Montgomery County Maryland, with a couple of her last years in Charles County Maryland. She was an involved woman. She took on all sorts of causes, was an active member of the Democratic party, involved in the leadership of her Unitarian Universalist Church, worked off and on in my grandfather's law office for many many years, and was well known for her generosity of heart and open-door policy for every wayfarer. 

Grandmiller, as I called her, was an artist with an artist's sensibility. She had a bohemian style and loved to get dressed up and you could hardly take her picture without an fresh application of lipstick, but also didn't think twice about going out in hair curlers. She was a modernist in so many ways and her home furnishings reflected that ethic. They had lovely Danish modern furnishings, but the home was always comfortable and open to all ages and all stages, a modern sentiment in home management if ever there were one.

I see so much of the influence of these two amazing, long-lifed women in my life. And so much of their influence in the home I'm building for my family. The mix of modern and traditional. The open-door policy for family and friends. The thrift and appreciation of quality. The incorporation of nature and art. And from both of them the determination and strength of spirit to endure hard work and hardship with grace and good will (well, while I'm being honest, the grace and good will is a work in progress for me, to be sure) for the purpose of making a life full of people, places, and things they love and are proud of. This legacy surrounds me every day as I go to the building site.

Fare thee well, my beloved grandmothers. I miss you and love you both so very much and am so very, very glad for the influences you've had in my life. xoxo

Saturday, May 8, 2010

grey foam

The Boy Builder says our home has gone from looking like a pirate ship to looking like a castle. The change that has brought this one is the addition of the grey foam.

As weather allows, we've been applying rigid foam insulation to the exterior of our structural framed walls. When all is said and done, our walls — from inside to out — will have the following layers:

:: 1/2 inch drywall and plaster
:: 5-1/2 inch 2x6 stud walls filled with blown in insulation
:: 7/16 inch OSB sheathing
:: 8 inches rigid foam insulation
:: 3/4 inch nailing strips
:: Siding – in some places bamboo plywood and in some places corrugated steel

When you add all that up, our walls will be nearly 16 inches thick! And an approximate insulative value of R-5000, by some accounts.

The process of getting all that foam on the walls goes something like this:

~ The first step is the prep the ledge. Our basement walls have 7 inches of foam on the exterior and this foam serves as the ledge. Before we could get started, we cleaned snow and ice off; cleaned mud, dirt and grit off; fixed any sealing that needed fixing; roughed up the surface with a rasp; and attached metal wire mesh to be folded up over the nailer strips to keep varmint from crawling behind our siding.

~ While the ledge is being prepped, the window openings are cut out to be marked on the foam

~ Next tall "sheets" of foam are raised into place and dry-fitted. Cut-outs for rafter tails, windows, and doors are marked and cut out with a hot wire cutter.

~ Then expanding foam glue is applied to the entire surface of the foam facing the wall, being sure to have a continuous edge and no sneaky circuitous routes for air to get through as well as good adherence to the wall. The ledge is also foam glued.

~ The sheet is then raised into place, being careful not to smear the glue around during raising.

~ During this part, someone else is applying gluey stuff to the backs of the nailing strips.

~ Then there is a frantic period where everyone is climbing around on ladders and scurrying up and down stairs to apply the nailing strips with long screws, clamp the foam to the wall and otherwise make sure the foam gets securely adhered to the wall before the glue sets.

~ Then we do it all over again until the house is complete! When we're all done, maybe we'll get another grin like this:

All this must be done when temperatures and weather conditions allow, meaning that it's been a slow process. And, despite the fact that we are talking about styrofoam here, which isn't theoretically very heavy, it's still serious work getting that foam up. All the slipping and sliding on snow, all the up and down on ladders and stairs, all the holding heaving impact drivers in awkward positions, all the lifting of 8 inches thick 18 foot long 4 foot wide pieces of foam adds up to sore muscles and tired bodies.

But that doesn't stop some Boy Builders from making a little artwork from the materials.

So come on by and check out the castle sometime. Just be careful of the guard. He can be mighty fierce sometimes.